
The first 5 steps in Google Cloud you want to check before production deployment
Master your Google Cloud and secure it for production with those best-practice configurations.
Google Cloud Platform is a contemporary cloud environment where you have access to all the tools needed to start developing scalable and easy-to-maintain backend applications, including API services, data pipelines, web systems, and more.
The default platform settings that are applied when you create your first project and begin development are designed to be both easy to start with and secure enough for typical preliminary experimentation.
However, there are some best practices we recommend you go through if you’re seriously considering deploying production systems. These items aren’t automatically set up by Google Cloud by default, but they’re easy to get into place, and doing so can make your life considerably easier (and more secure!) down the line.
We’ve put them all together in this handy checklist, so you can be sure your Google Cloud setup works the way you want it to:
- Create and place all your projects in an organization resource
- Set up access management
- Set an organization policy if your data processing is subject to location restriction rules
- Use custom service accounts instead of default service accounts
- Use custom networks instead of default networks
We’ve even got a bonus checklist item and some AWS considerations waiting for you further down. Let’s dive in!
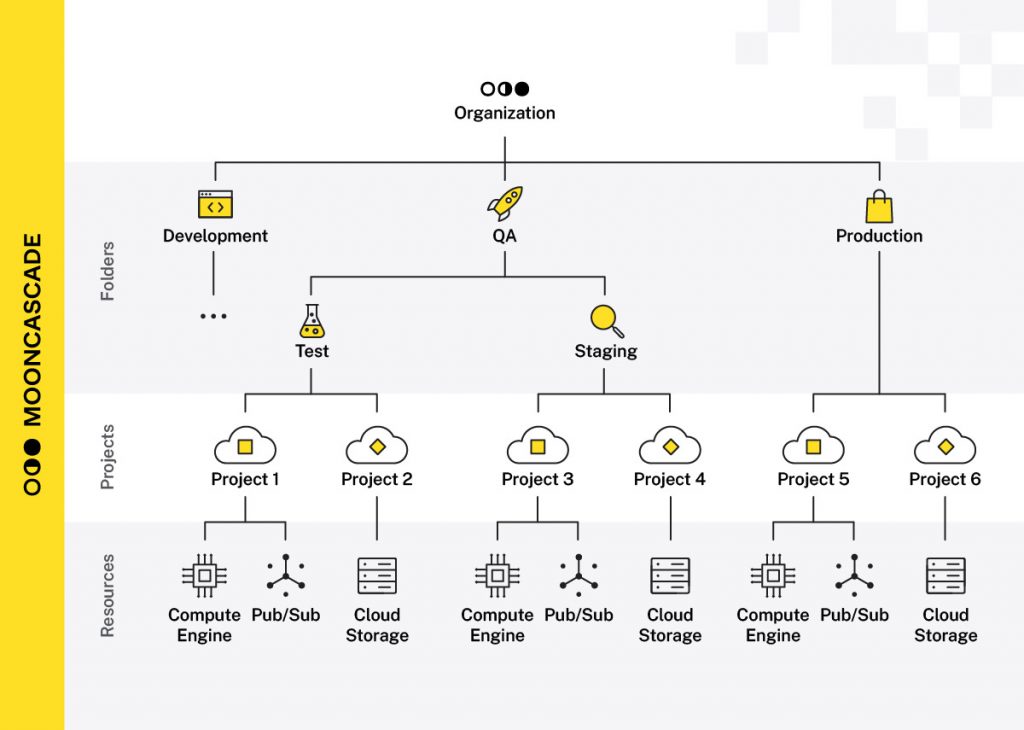
1. Create and place all your projects in an organization resource
Having an organizational resource allows you to create project folders beneath it, and place projects within the organization or folders.
This allows you to:
- Logically structure projects based on units/teams, environment type (e.g. production, test), or other criteria as needed, for better visibility.
- Establish a top-down access rights system where permissions are inherited from the “parents” in the structure (organization → folder → subfolder → project).
- Apply organization and folder policies consistently across all projects. This is a useful capability in general, but you’ll also get to see it in action in one of our other checklist items!
How to set up an organization in Google Cloud
An organization resource will be automatically created for you if you create a Google Workspace or Cloud Identity account and associate it with a domain. (For more information on how to get an organizational resource, you can refer to the official guide on Creating and Managing Organizations.)
Keep in mind that you will not have access to the organization (and folders) if you use Google Cloud via your personal Gmail account. While this may be a convenient way to experiment with Google Cloud services, it can lead to missing the opportunity to shift to a proper organizational setup before deploying your first production backend.
At Mooncascade, we’ve seen people begin using Google Cloud and creating deployments via their Gmail accounts, but this approach can result in missed opportunities for manageability and security that come with an organizational and folder structure, as well as hierarchical access rights and policy propagation within the organization. Using a proper Cloud Identity or Workspace subscription can actually provides adequate identity (user and group) management.
If you want to add Organization Admins you can follow the instructions provided here. If you’re supposed to be an Organization Admin, be sure to add yourself as well, as this role is not assigned by default (even if you are logged in as a Super Administrator!).
For best practices related to Super Administrator account management, make sure to consult the relevant documentation.
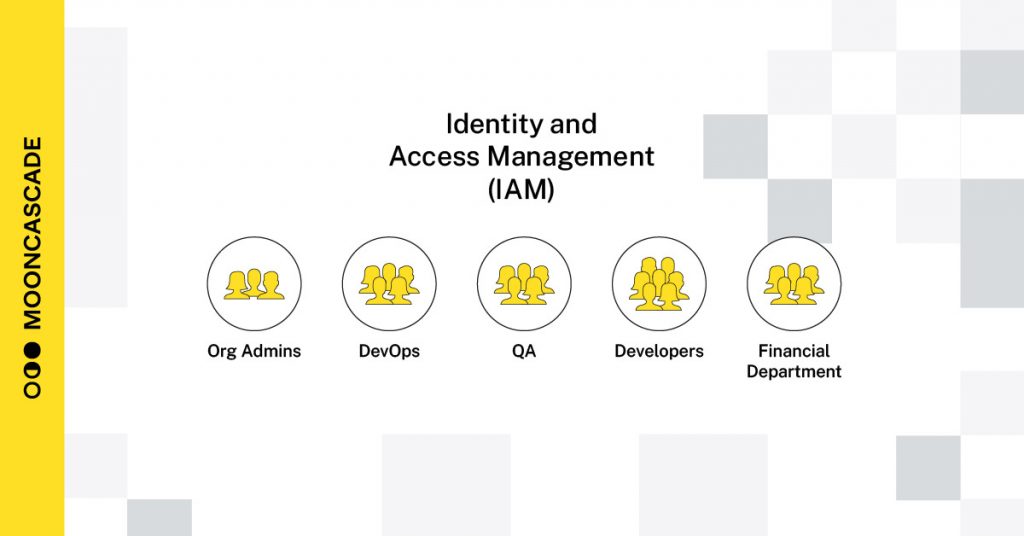
2. Set up access management
During the piloting stage, it’s usually acceptable for engineers to freely experiment with the platform, creating, modifying, and deleting instances, and trying out different services.
However, as you move to production, additional requirements arise, such as mitigating risks related to personnel and ensuring continuity and transparency. This means that different people must have different sets of access permissions.
For example, some individuals may need access to billing only (e.g., accounting), while others may require the ability to view everything but not change anything (e.g., audit). Some people may need to perform specific activities with a particular set of resources (e.g., testers with test environments), while others may need to ensure that all the pieces work together and can be expanded over time (e.g., CTO).
Finally, you’ll likely want to be able to quickly assign permissions for new employees and revoke permissions for departing employees.
Here are some ways to set up access management:
- Define groups with the required permissions
- Add people to specific groups
- Give permissions in Google Cloud Platform (GCP) only for groups
To ensure redundancy and safety of your product organization, it’s important to have at least two super admins on the organization level. However, avoid propagating those admin rights too widely. In most cases, 2-3 super admins are sufficient. In larger organizations, you might extend it to 4 or even 5, but having more is somewhat questionable.
For increased security, here are some additional tips to consider:
- Have separate super admin and daily user accounts for yourself and all other super admins.
- Avoid using super admin privileged accounts for daily work that doesn’t require super admin rights.
- Consider using different delegated admin roles for different administrative tasks when necessary.
- Apply additional security policies for your super admin accounts from the Workspace admin console by using a separate dedicated Organizational Unit for them.
3. Set the resource location policy at the organization level if your data processing is subject to location restriction rules
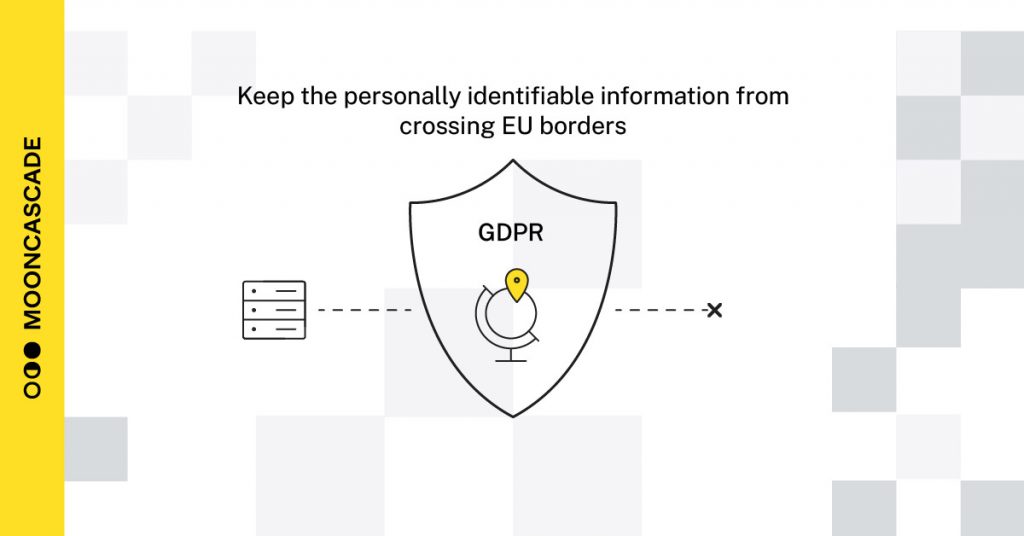
If your product is subject to liabilities under e.g. the European GDPR regulations, it’s important to ensure that any personally identifiable information stored in your systems does not accidentally cross EU borders. If you’re not careful, your data could easily end up in the wrong region.
One cause of this in the Google Cloud environment is that, by default, GCP tends to create resources in US-based data centers unless you explicitly specify otherwise. While it’s possible to always specify the location asinside EU when creating storage buckets, VMs, or BigQuery datasets, it’s easy to forget to do so by accident.
To prevent such accidents, we recommend establishing an organization-level policy that only allows resources to be created in your preferred locations. This ensures that Google Cloud adjusts its default resource location settings for you, and it will also give you a failure error message if you accidentally attempt to create a resource in a region that does not match your location policy. Following this practice is particularly important if you’re subject to location restriction rules, regulations, or agreements.
It’s vital to set this up correctly in the beginning, as it can turn out to be a nightmare to fix later.
How to set up an organization policy in Google Cloud
- Ensure you have Organization Admin access rights (see section 2 further up about access management on how to give those rights to yourself).
- Go to the IAM & admin > Organization policies page in the cloud console. Locate the “Google Cloud Platform – Resource Location Restriction” policy, and click on it.
- Select the organization as the resource context: click on the resource selection button on top of the page > click ALL tab on resource selection dialog > click on your organization name.
- Click MANAGE POLICY (or whatever the button label at the moment of your looking is – it has been “EDIT” earlier).
- Ensure that the following values are set (here using the EU example, but see the possible custom values for other regions from here):
- Applies to: Customize
- Policy enforcement: Merge with parent (ensures that policy can’t be relaxed at lower levels of resource hierarchy – “Deny” overrides “allow”)
- Policy values: Custom (you find it under the “Rules” section where you might need to expand an existing rule to see this setting).
- Policy type: Allow
- Custom values: in:eu-locations (see the value groups you can use here).
- Click SAVE.
The best way to set this up is in the beginning, before creating any resources. Already created resources without setting the policy? We still recommend you fix this. However, there are a few things to be aware of:
Creating the policy won’t work retrospectively – if you’ve already created resources in locations that don’t match the policy, they will stay there. The resources won’t be moved automatically, but it might restrict automatic child resource creation or other functionality, as stated here.
The referred page also describes the list of services that are supported by the resource location policy. You’ll have to find suitable ways to fix the location of those resources. For the existing system, we recommend using the gradual testing approach to establish the location policy. Create a separate project folder under that organization, and apply the policy on that folder.
Then gradually, project by project, move the projects to under that folder and see if everything works as expected. If all projects are moved to that folder, you can apply the policy at the organization level and eliminate the need for that dedicated folder.
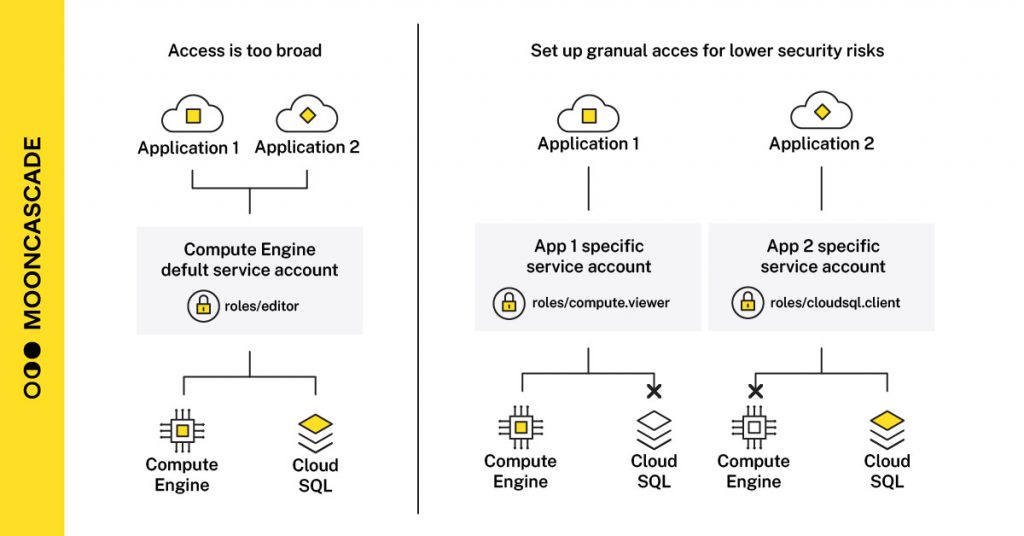
4. Use custom service accounts instead of default service accounts
Applications or compute workloads need service accounts for authorized access to resources.
When you create an App Engine, Cloud Run, or other form of application deployment, you want your application to be able to access other cloud resources. To ensure authenticated and secure access, your application must have a service account attached to it.
Google Cloud automatically attaches default service accounts to your deployments, which makes it easy for newcomers to experiment.
However, this approach uses an older access scopes-based access model that grants broad access with too broad granularity, which in turn posesing unnecessary security risks.
We recommend doing the following:
- Define your custom service accounts and use those. This approach provides better access granularity provided by thea roles-based access model.
- Enforce the “Disable Automatic IAM Grants for Default Service Accounts” policy.
- Disable unused (default) service accounts.
- Do not delete default service accounts. Deleting a default service account might break the deployment, because it has since they have some inner workings related to your existing deployment.
Custom service accounts are easier to design into production deployments from the beginning but can be complicated to implement later.

5. Use custom networks instead of default networks
Similar to default service accounts, your compute workloads also require (virtual) networks through which they can connect to other cloud resources.
Again, Google Cloud provides a default network for every project (called Virtual Private Cloud or VPC), which makes it easier to start experimenting. However, it creates subnets for every region with related routes, which are unnecessary artifacts for production environments, and the security command center displays them as problems.
For production purposes, it’s better not to create them and use custom mode VPC networks, which is a recommended production approach by Google as well. You can disable the creation of default networks by applying the “Skip default network creation” policy for production deployments.
Instead of allowing default networks into your production environment, you can use Infrastructure as Code (IaC) tools such as Terraform to create the custom networks together with your production deployments. Using IaC also goes as a general recommendation for anything production, as it avoids manual and error-prone work in production environments.
6. Bonus item: Configure your billing
Oh, you thought we were done at five? We’ve got one additional checklist item for you. This one has everything to do with billing accounts. That’s right, the billing accounts that pay for projects,
Here are some things to consider around your billing configurations before going into production.
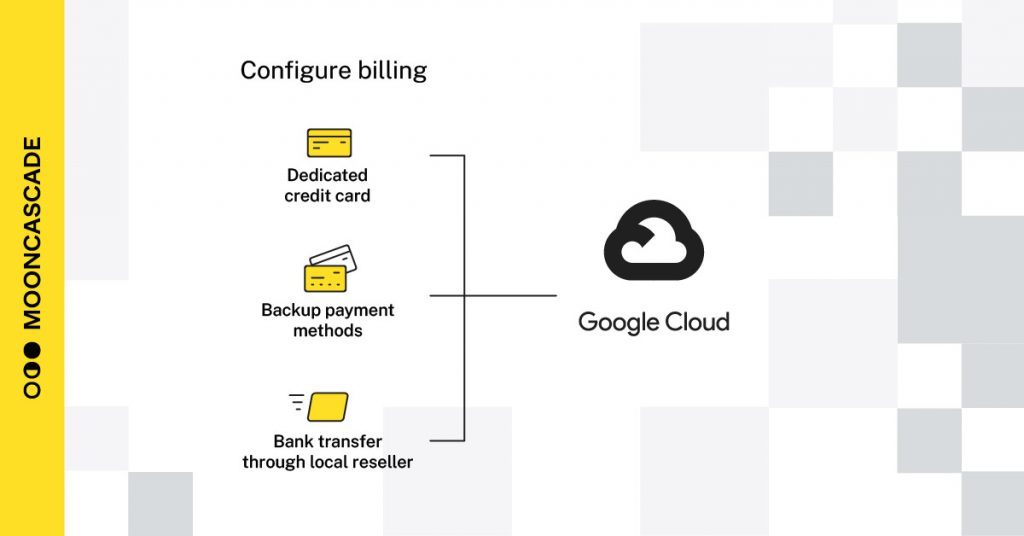
Choose a payment method
Usually, you set your initial billing up by using a credit card. But what if your business starts to grow, traffic loads increase, and cloud costs start to rise? What if the credit card limit runs out?
This can more easily happen when the same credit card is used for other purposes than paying for cloud resources. It’s probably okay to operate from an arbitrary credit card when you are just experimenting, but you probably don’t want service disruptions due to the failing payment method when your business is at a peak of an expanding campaign curve.
To address the payment method risks before launching the production deployments, it is recommended to:
- Set up a dedicated credit card with sufficient limits.
- Have a backup payment method for cases where something happens to your primary credit card.
- Engage with a local Google Cloud reseller (like Mooncascade) with whom you can transact via regular bank transfer orders without the need for a credit card.
Know your costs
Since payments are usually made on a monthly basis, it’s possible for a cost-consuming process to go unnoticed until you receive your end-of-month bill, or even later when your CFO starts asking difficult questions.
To catch such incidents as early as possible and avoid more significant problems, it’s advisable to set up budgets and alerts that trigger immediately when certain preconditions are met.
Configure your labels
If not you, then sooner or later someone else will ask for cost details. Google Cloud provides default reports with breakdowns by projects, services, and SKUs.
However, it may become difficult to track costs per your own logical services or environments (e.g. dev, test). You can use labels to help with this. The reporting dashboard allows you to look at breakdowns based on resource labels, but you must set them up yourself. Labels can be added to projects and to each resource separately.
Don’t wait with setting them up! Labels are easy to turn on, but they and will not recover data from the past, so it pays off to turn them on early. If you turn them on later, reporting breakdowns based on those labels will only be available for the time period starting from when they were turned on, not for earlier time periods.
Enable billing export into BigQuery
By default, you have access to billing and cost breakdown reports only under the Billing section in Cloud Console. However, you can use billing export for more thorough data analysis with custom SQL queries and BI dashboards. To use this option, you must enable billing export into BigQuery.
(Note that BigQuery is a paid service, and having data accumulating into a BigQuery dataset may incur additional costs to your monthly bill. However, the amounts are usually marginal. Check it occasionally to avoid surprises. It’s advisable to turn on billing export right away.)
Again, don’t wait with setting this up! It’s advisable to turn on billing export right away. Just like with labels, turning it on is easy, but it won’t recover past data. To turn it on, create a dedicated project (under your organization or somewhere in the folder hierarchy under it) and a BigQuery dataset for it. Then, go to the Billing section in the Cloud Console, click on the “Billing export” menu item, and follow the on-screen instructions. You can also find more explanations and instructions here.
7. We can hear you thinking, “What about AWS?”
Excellent question. Let’s apply some items from our checklist to AWS as an added example:
Know your account structure
- Start with one root account
- Set up a proper org account folder and structure before deploying production
Access management
- Create a proper setup from the org account with IAM Identity Center
- Use service control policies to avoid insecure or inappropriate production deployments
Use IaC
- Avoid manual and error-prone work in production environments
Billing
- Know your costs on a daily basis
- Ensure the safety of your payment methods
- Have a relationship with a local reseller (like Mooncascade)
- Use labels
- Turn on Cost Usage Reports for custom analytics
The thing is, a similar story applies to all public clouds (not just Google Cloud or AWS, but also Azure, Oracle, etc.). Cloud vendors compete to make it as easy as possible to start using their environments, while providing versatile tools to make it more suitable and secure for production deployments as you become familiar with the environment.
As a final note
As a final note, we hope our checklist when deploying your products and/or services into production is helpful. We’ve experienced these considerations to be quite common across any production deployments; – hopefully, this checklist will help you save time by getting faster to the questions you need to ask yourself and your team anyway.
These recommended measures are almost entirely free. On occasion, they might incur some minor specific tooling costs (like billing export to BigQuery in Google Cloud or Cost Usage Reports to a storage bucket in AWS). However, they help you avoid potentially much higher alternate costs. The vendors themselves mostly document these measures as “best practices,” which you can search for in their respective documentations.
If you’d like to get more independent, consensus-driven best practice recommendations, you can check cisecurity.org vendor benchmarks.
About the authors
Asko Seeba, is a Cloud Engineer and Co-Founder of Mooncascade. He is an Estonian C/C++ hacker from the 90s and an ex-Skype engineer(-ing manager). He has experience with blockchains, including hash-chains-based timestamping, audit trails, and Merkle Trees (i.e. all the components of Bitcoin blockchains) 10 years before it was even called blockchain (1999-2001). He has managed early development projects that spawned some of the prime Estonian e-government pillar systems and helped kill credit card fraud in Skype with machine learning in 2005; a full decade before the activity was called data science. He advised the first wave of startup investments that emerged from Skype and Playtech exits and contributed to the startup-community buildup by participating in the founding of Estonian Founders Society and Garage48 hackathon series. At Mooncascade, he contributes to activities related to Cloud Platforms.
Harles Paesüld is the Head of Cloud Platforms at Mooncascade. After graduating from Tallinn University of Technology with a degree in economics, he implemented ERP systems for five years. He then moved to Hansabank/Swedbank to build up and lead QA in the Estonian unit. For the last five years, his attention has been on making platforms and infrastructure services better by reducing technical debt, implementing risk management, improving monitoring, logging, automation, and the team’s skills to replace nasty incidents and boring maintenance tasks with high RTO/RPO/MTBF. At Mooncascade, he manages activities related to Cloud Platforms.
Mooncascade is a software product development company that provides a wide array of software application development consultancy services. We’re an official consultancy and resell partner for both Google Cloud Platform (including GCP and Workspace) and AWS. You can find more information here.


